We’ve all been there, you pull out your favorite shirt from the closet, only to find it creased and wrinkled, completely squished from being packed away, and there’s no iron or ironing board in sight. Ironing a shirt without an iron might sound impossible, but trust me, after years of traveling and last-minute outfit fixes, I’ve picked up some surprisingly effective techniques that make this a simple and even rewarding process. Whether you’re prepping a dress shirt for a formal occasion or getting a casual linen shirt ready for a relaxed outing, keeping a polished and crisp appearance is very much achievable without having an iron at hand because a freshly ironed shirt that feels and looks sharp is never just about the tool you use, it’s about knowing the right approach, and ironing a shirt no longer has to be a daunting task.
(If you do have an iron but want the correct technique and sequence, the full guide is at How to Iron a Dress Shirt. And if you’re trying to decide between non-iron and easy-iron shirts entirely, this breakdown is the cleaner starting point.)
One of my favorite tips I swear by is the shower method i.e simply hang your creased shirt on a hanger in the bathroom, as close to the hot water stream as possible, let the steam and moisture do their job, and you can even multitask by taking a hot shower at the same time. The placement of the shirt matters here, keep it where the steam hits best, and within 15 minutes, the wrinkles start to relax and the fabric loosens up beautifully, leaving your shirt looking fresh and wrinkle-free without any iron at all.
For more hands-on alternative methods, grab a hairdryer and a spray bottle for some quick misting, or use a damp cloth to dampen the garment evenly first. Once the clothes are slightly damp, switch on the hairdryer and start smoothing out the wrinkles by directing it to blow hot air across the fabric, keeping it about 2 inches away while you press and dry each section. This works brilliantly for t-shirts, pants, and sweatshirts too, and if you have more time, ironing out creases through overnight placement under a mattress is another surprisingly effective trick worth trying.
Believe it or not, some of the most effective methods for getting smoothed clothes come straight from ancient Russia, where people would fill an iron mug, saucepan, pot, or kettle with hot water and glide the underside of the hot container across the fabric, covering a wider area depending on the diameter of the container. The stove heats the water as it boils water inside, and as long as the underside stays spotlessly clean, it won’t leave a stain on your shirt or tissue. This is a surprisingly fast and simple approach, though it does require careful attention.
Another clever trick is the self-smoothing solution: dissolve a little vinegar and fabric softener in water, mix it well, and pour the liquid preparation into a spray bottle. Once you moisten the shirt evenly, the folds disappear as the fabric dries, leaving your clothes looking completely neat with no stains on the appearance whatsoever. You can also just sprinkle plain water and follow up with a hair dryer for a similar effect, though the vinegar solution gives a noticeably better result.
The stretching and pressing trick works well if you discover an iron breakdown the night before: straighten every fold carefully, sprinkle some vinegar solution or water over the shirt, then place a heavy object or large object like a mattress on top so it covers the clothes completely, letting the sleeper’s weight do the work overnight for a long effect by morning. It does take a long time, but the results speak for themselves.
A wet terry towel spread on a flat surface like the floor, table, or bed with the shirt laid on top uses moisture and steam to smooth the fabric over one to two hours, though the shirt comes out quite damp and needs to dry on a hanger in a ventilated area. This works across wool garments, cotton, and synthetics with careful straightening.
A hair straightener is great for targeted areas: clean the inner surface of the forceps, heat the device to a high temperature, and run it top to bottom while the shirt hangs on a hanger rather than lying on a horizontal surface, making it easy to tackle sleeves, collar, bottom edge, and large folds and smooth out any roller creases, though wider fabric sections can still be tricky. Make sure the surface is free of anything that could leave stains and never let it curl against the clothes unsupervised.
An incandescent light bulb acts surprisingly like hot iron cookware: wipe away accumulated dust using a damp cloth, then run over the shirt with the lamp or raise your clothes to it, keeping the seamy side facing the surface to avoid stains and wrapping your hand in a towel before you unscrew it since it gets very hot.
Finally, the simplest fix of all uses pure body heat: put on a wet thing and let your natural warmth smooth out creases in the fabric. It is not the most pleasant method and you may inhale vinegar fumes if you spray a vinegar solution first, which is admittedly unpleasant, but if you have no desire to deal with hair tongs, a boiling kettle, or a hot light bulb, this wet and effective approach gets the job done with an improved result when the solution is used.
Most people assume that ironing a shirt properly requires an ironing board, but honestly, once you know the right substitute surfaces to use, you barely miss it. A sturdy table is probably the easiest alternative, just make sure it can withstand heat, then lay down a thick layer of towels to protect the surface and give you something firm to press against as you run the iron over your shirt. A bed or mattress works surprisingly well too since you already have a cushioned surface ready to go, though you need to pull the covers tight so they don’t bunch up and press new wrinkles right back into the fabric.
When I have found myself in a pinch while traveling, a tiled floor has honestly saved me more than once. It is firm, flat, and easy to work on as long as you layer enough towels between the shirt and the floor to absorb both moisture and heat from the hot iron. Just be careful if your space has laminate, wood, or linoleum floors because a hot iron placed too close can leave permanent burn marks that are impossible to fix, so always stick to tiled floor options or keep that protective thick layer of towels in between no matter which surface you choose.
Non-iron shirts are chemically treated during manufacturing to resist wrinkles, but the treatment is not permanent, and it is not infallible. If you are pulling a non-iron shirt from the wardrobe and it still looks creased, one of three things has happened: the treatment has weakened with repeated washing, the shirt was washed at too high a temperature (above 40°C breaks down the finish faster), or the shirt was left bunched in the drum after the cycle ended.
The fix for a misbehaving non-iron shirt is steam, not a flat iron.
Run the shower hot, hang the shirt on the rail inside the bathroom, and close the door for ten minutes. The steam relaxes the treatment finish and allows the fabric to fall smooth without needing pressure. For a faster result, use a handheld garment steamer held two inches from the fabric move in long, downward strokes from collar to hem. Do not press the steamer head directly against the shirt; the gap is intentional.
If you must use a flat iron on a non-iron shirt, set it to a low-medium heat (150°C maximum) with minimal steam and use a pressing cloth between the iron and the fabric. The chemical finish on non-iron shirts is sensitive to high direct heat, pressing at full cotton temperature will damage the treatment permanently and the shirt will never perform correctly again.
For a full breakdown of how non-iron and easy-iron shirts differ and how to choose the right one for your wardrobe the guide on Easy-Iron vs Non-Iron Shirts: The Difference Nobody Tells You About covers the chemistry and the buying decision in detail.
A wrinkled shirt is never the end of the world, and as this guide proves, you do not need an iron to look polished and put-together. Whether you reach for a hairdryer, a steamy shower, a kettle, or a simple vinegar solution, the right technique is always within reach. Heat and moisture are your two greatest allies, and once you know how to use them, getting a crisp and fresh shirt without an iron becomes second nature no matter where you are or what situation you find yourself in.
One trick I always recommend when there is no iron around is using a kettle to boil water and letting the steam do all the heavy lifting. Simply hold your wrinkled garment about a foot away from the spout and let the steam it releases naturally work through the wrinkles, targeting any lingering wrinkles that refuse to get rid of themselves with just a shake or a hang, and within minutes your clothes look noticeably smoother without any extra effort on your part.
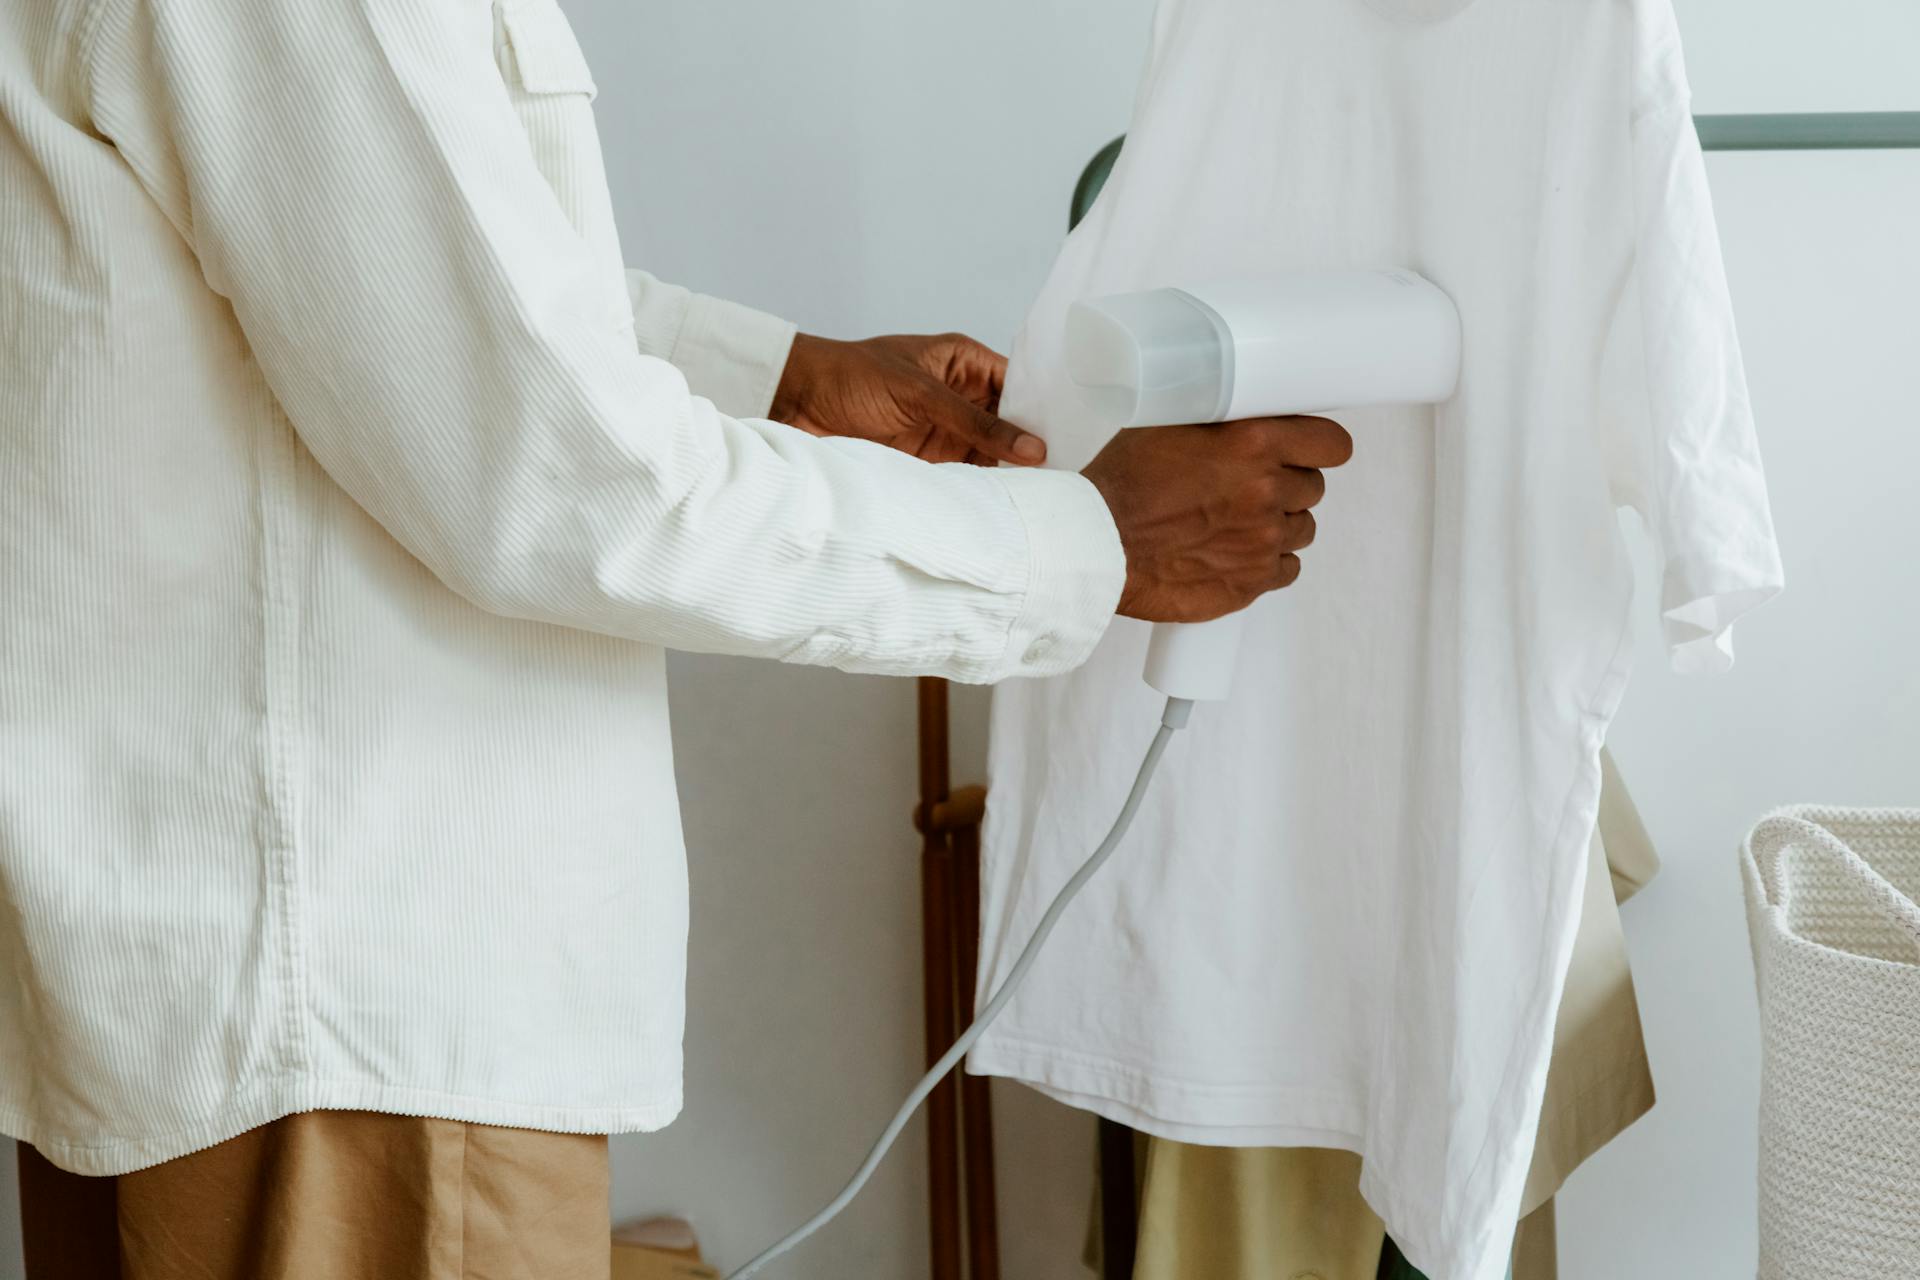
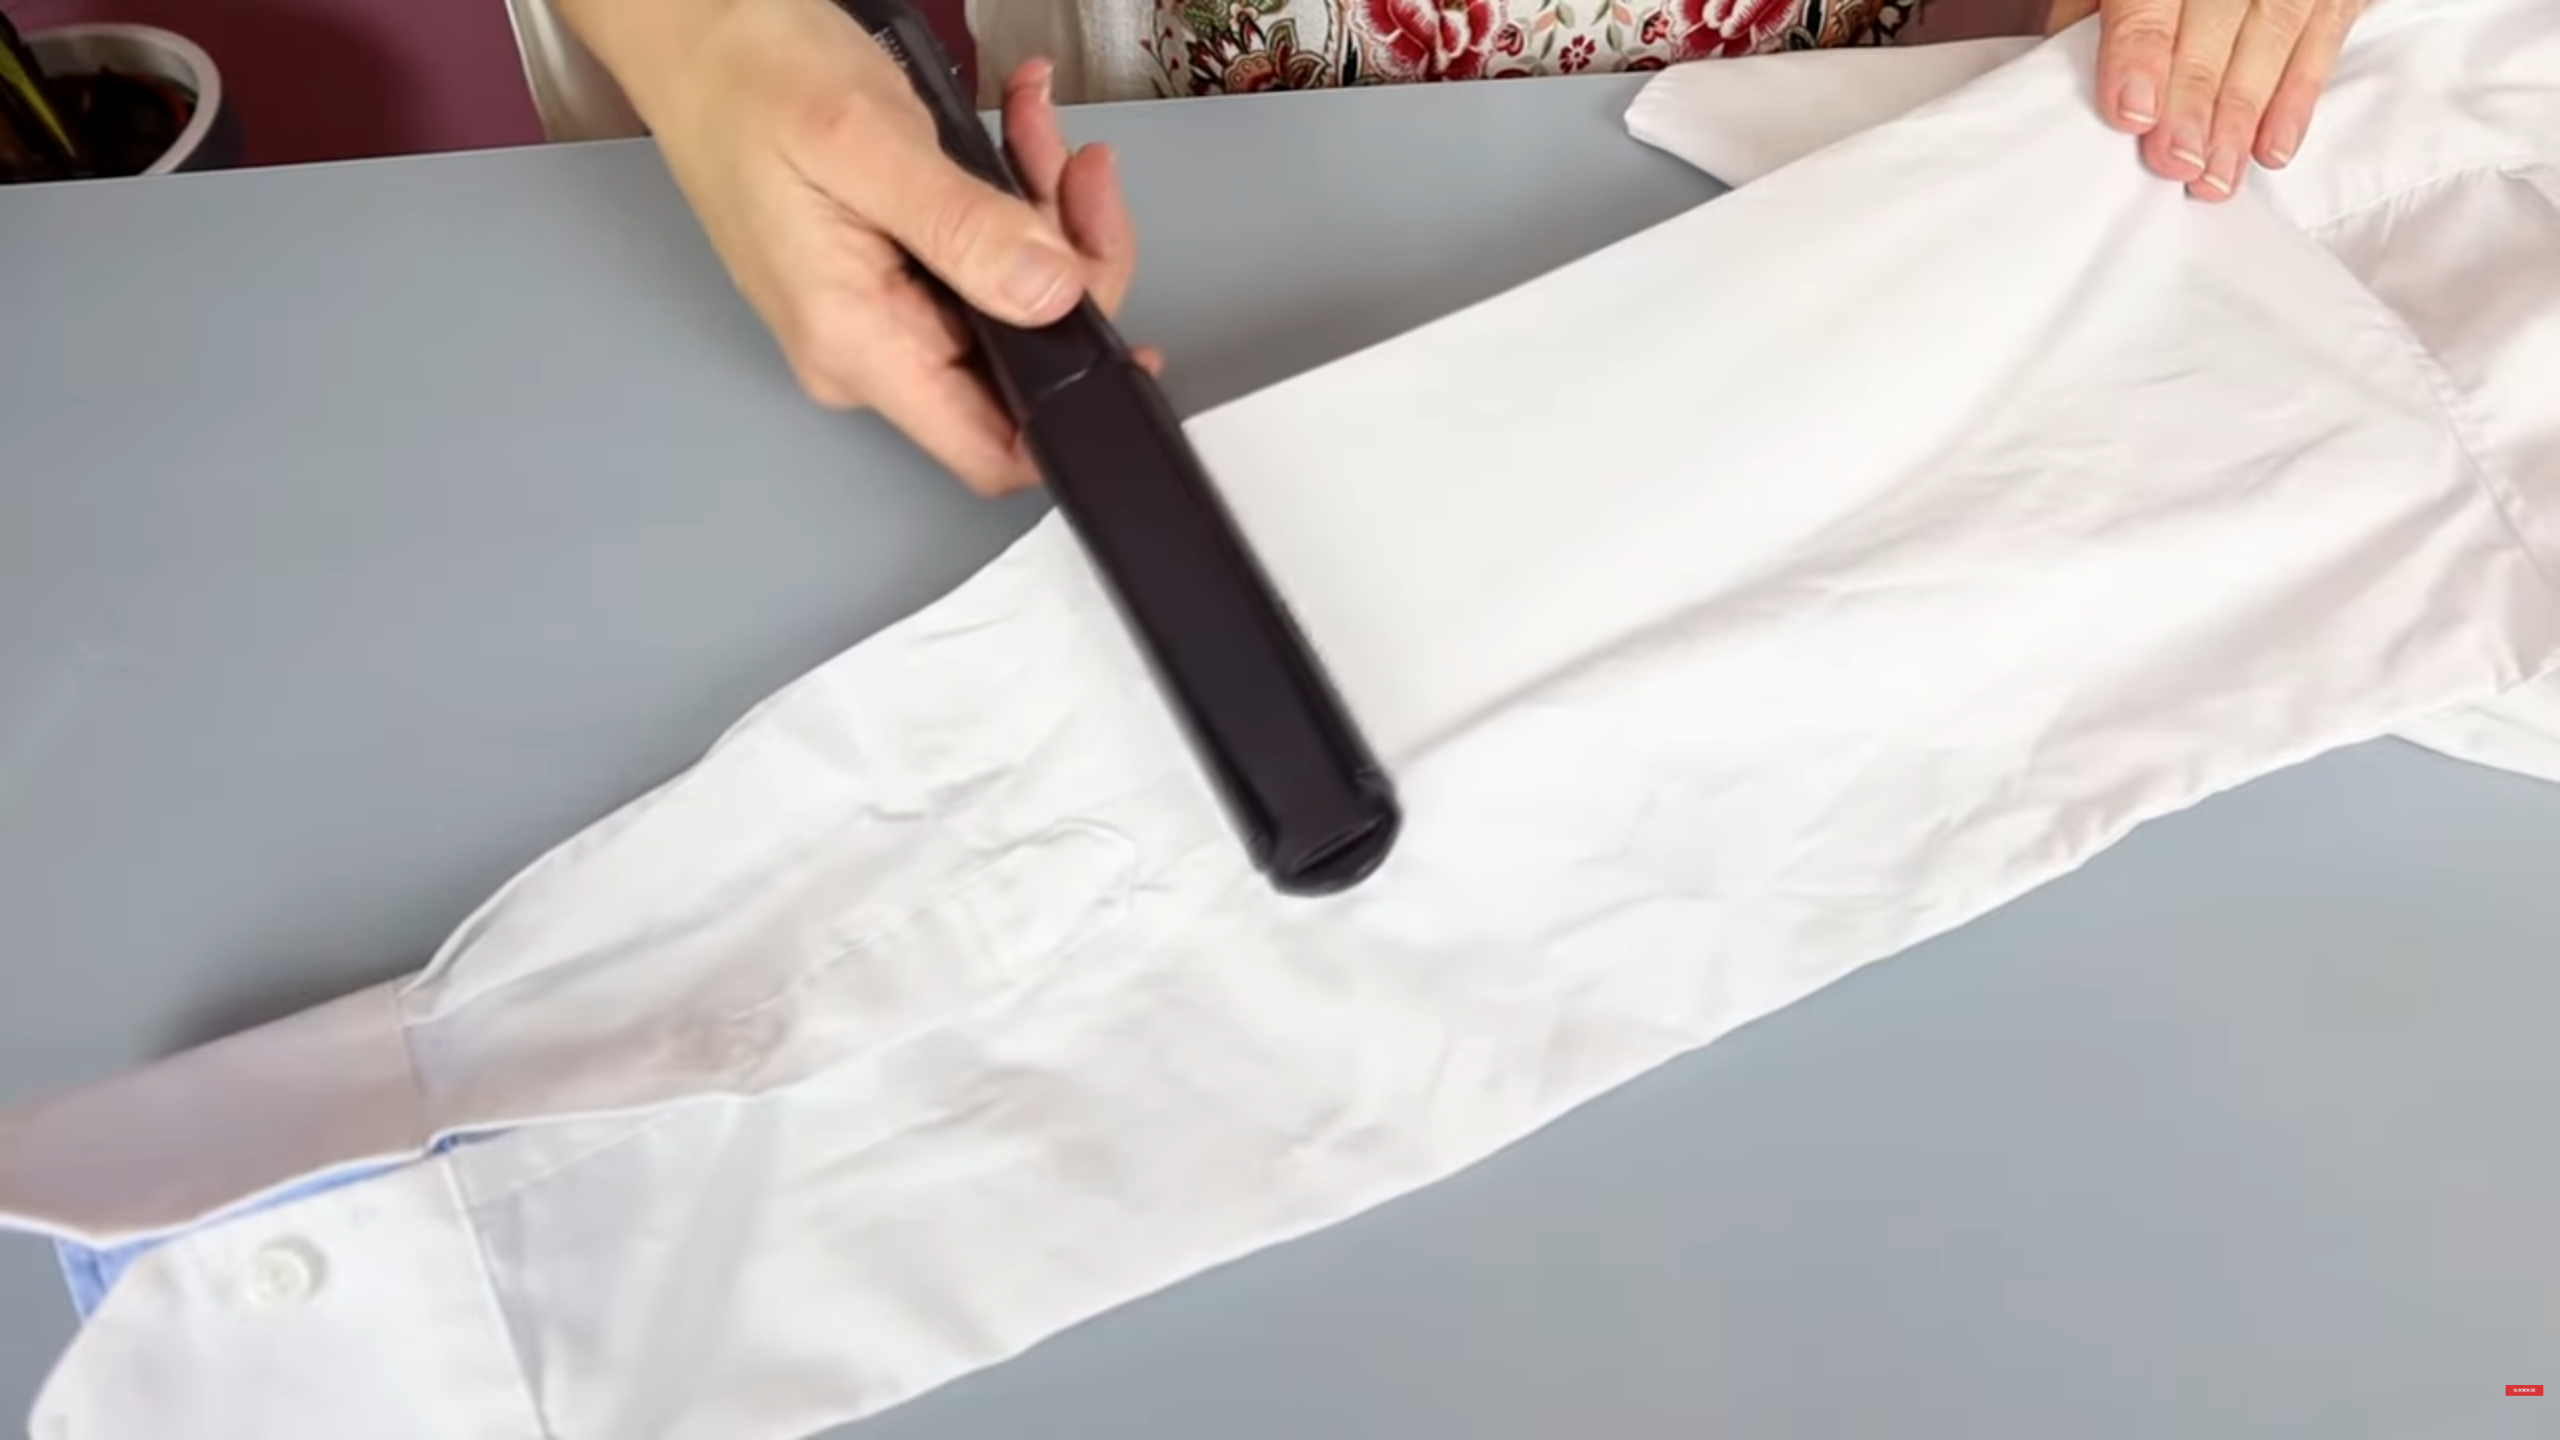
Yes, and this is honestly one of my go-to moves when I need to iron a shirt in a pinch without any proper equipment around. The key is to start by hanging the shirt up and lightly spritzing water over the wrinkled areas since dampening the fabric first is what allows the heat to actually remove wrinkles effectively, especially on cotton. Then hold the hair dryer at about 1-2 inches away from the surface and work through each section on medium-to-high heat while pulling the fabric taut with your free hand, and for best results keep moving the dryer steadily so the heat distributes evenly across the fabric without concentrating in one spot too long.
When there is no iron around and you need to remove wrinkles from your clothes quickly, some of the fastest methods I have tested involve everyday items you already own. The dryer trick is my personal favorite: tossing your garments into the dryer with a damp towel or a few ice cubes for just 10 minutes generates enough water vapor to smooth everything out effortlessly, while a handheld steamer gives you even more control for targeted wrinkles. If neither is available, a hairdryer combined with light misting of water over stubborn areas and gentle smoothing by hand works just as reliably to get your clothes looking neat and crisp without ever needing a traditional iron.
The fastest method without an iron is the bathroom steam technique: hang the shirt on a hanger inside a closed bathroom, run the shower on its hottest setting, and leave it for ten to fifteen minutes. The steam relaxes the cotton fibres and the shirt falls smooth on the hanger as it cools. For collars and cuffs – the sections that need the sharpest result – follow up with a hair dryer on a medium-heat setting, pulling the fabric slightly taut with one hand while directing the heat across the section with the other.
One of the simplest setups for ironing a shirt at home without a proper board is to lay down a thick layer of towels on any flat surface and place your shirt right on top, giving you a firm yet padded base that holds the fabric steady as you work the iron across it. A bed or mattress works just as well since you already have a naturally cushioned surface to place your shirt on, and stacking a couple of towels on top keeps everything protected and smooth so your ironing session turns out just as clean and crisp as it would on a dedicated board.
Founder and Editor of Trendy Enthusiast. Ali covers men's fashion, lifestyle, grooming, and the art of dining well - blending real experience with practical insight.
Connect on Instagram