How to Pack a Suit Without Wrinkles: Every Method, Every Scenario
To pack a suit without wrinkles, use one of three methods depending on the bag and journey: the garment bag (best for hanging transit), the inside-out roll (best for carry-on or holdall), or the bundle wrap (best for a full suitcase with multiple garments). In all three cases, the suit goes in last, the trousers are folded along their natural crease lines before rolling, and on arrival the jacket and trousers are hung immediately — either in a steamy bathroom for fifteen minutes or on a wide-shouldered hanger in open air. The packing method determines how much work the arrival routine needs to do.
The man who arrives in a creased suit did not make a packing mistake. He made a preparation mistake — wrong method for the bag, wrong placement in the suitcase, wrong fabric for the journey. This guide covers all three methods in full, the fabric choices that make wrinkle prevention significantly easier, and the arrival protocol that recovers a suit when creasing has set in regardless.
Why Suits Wrinkle When Packed: The Actual Mechanics
Before technique, it helps to understand the science — because it explains why certain methods work and others do not.
Wool fibres — the primary material in most quality suits — have a natural crimp structure that gives them elasticity and the ability to recover from compression. When a wool suit is folded and placed under sustained pressure, the fibres are forced into a compressed shape. If held in that position long enough for the fibre’s memory to relax into it, the crease sets. The longer the journey and the greater the pressure, the deeper the crease.
Three variables determine how much creasing occurs:
Pressure: The weight bearing down on the suit from other items packed on top of it. This is why the suit always goes last — on top of everything else — and why overstuffing the bag is the primary cause of serious travel creasing. An overpacked bag creates pressure points at every contact between fabric and bag wall, seam, or zipper. Those pressure points are where the deepest creases form.
Friction: When packed loosely, suit fabric moves slightly against adjacent items during transit. That movement creates surface wrinkles — lighter than pressure creases but widespread across the fabric. This is what garment bags and bundle wrapping address: creating a protective layer between the suit and everything around it.
Fabric choice: High-twist wool — where the wool fibre is twisted more tightly before weaving — has greater springiness and shape retention than standard wool. It resists both pressure creases and surface wrinkles more effectively and recovers faster on arrival. Wool-synthetic blends with a small percentage of polyester or lycra add further wrinkle resistance. Linen suits crease heavily under any packing scenario and are not suited to bag travel. Cotton suits sit between linen and wool in their resistance — manageable with careful packing but not as forgiving as a good travel wool.
The practical implication: if you travel frequently with a suit, a high-twist wool or wool-blend suit is not a luxury — it is a functional choice that makes every packing method more effective.
Method 1: The Garment Bag
The gold standard for suit travel — when the conditions allow it.
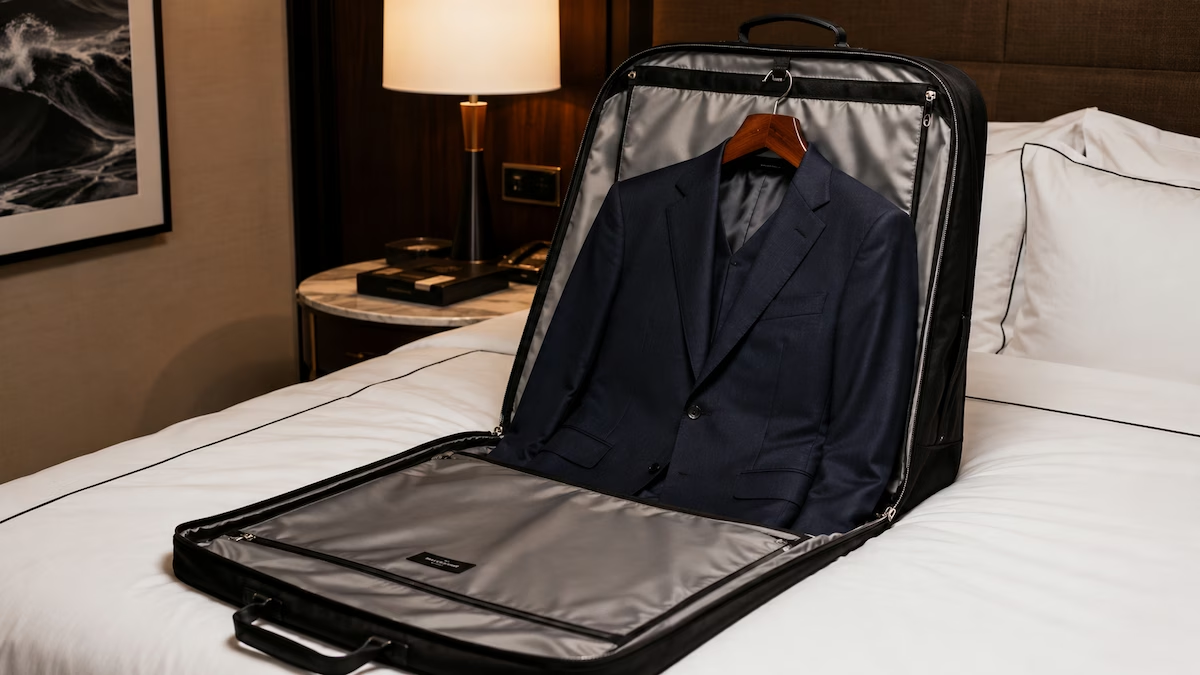
A quality garment bag holds the suit in its natural hanging position throughout transit, eliminating the pressure and fold-line creasing that all other packing methods manage rather than prevent. The suit is suspended rather than compressed. No fold lines. No pressure points. The jacket and trousers arrive in essentially the condition they were packed.
The conditions required for this to work:
The garment bag must travel hung or laid fully flat. This is the critical point that most garment bag advice glosses over. A garment bag folded in half across an overhead locker rail introduces a sharp horizontal crease directly across the jacket chest — the most visible part of the garment. A garment bag folded in thirds produces three crease lines. At that point, the inside-out roll method frequently produces a better result.
Garment bags work best: in the car boot laid flat, on a short train journey where the bag can hang or lie flat, or on a flight where an attendant can hang it in the cabin closet (business class and some first class cabins). They work poorly when forced to fold in a standard overhead locker.
How to pack the jacket in a garment bag:
Button the top button of a two-button suit (or the middle button of a three-button suit) to hold the lapels and front panels in their natural tailored shape. Fold the jacket in half lengthways — right shoulder to left shoulder — with the lining facing outward. Hang it on a wide-shouldered hanger inside the bag. Wire hangers distort the shoulder seam under the jacket’s own weight; use a contoured wooden or plastic hanger that supports the shoulder seam properly.
Trousers in a garment bag:
Hang the trousers from the crossbar of the hanger, folded along their natural crease lines — front and back creases aligned. Do not drape them loosely; a loose drape during transit introduces new creases as the fabric moves. The trousers should hang under the jacket, creating a single compact unit inside the bag.
Bi-fold vs tri-fold garment bags:
A bi-fold bag folds once across the middle. A tri-fold folds twice, producing a shorter, more compact bag that fits more easily into overhead lockers — but introduces two fold lines into the suit. For short journeys, the tri-fold is practical. For longer travel or with a suit you need to look impeccable in immediately on arrival, a bi-fold is the better choice.
Method 2: The Inside-Out Roll
The most reliable method for carry-on bags, holdalls, and any situation where a garment bag cannot travel hung. Covered in full in How to Fold a Suit for Travel — the companion guide to this one — but summarised here for completeness:
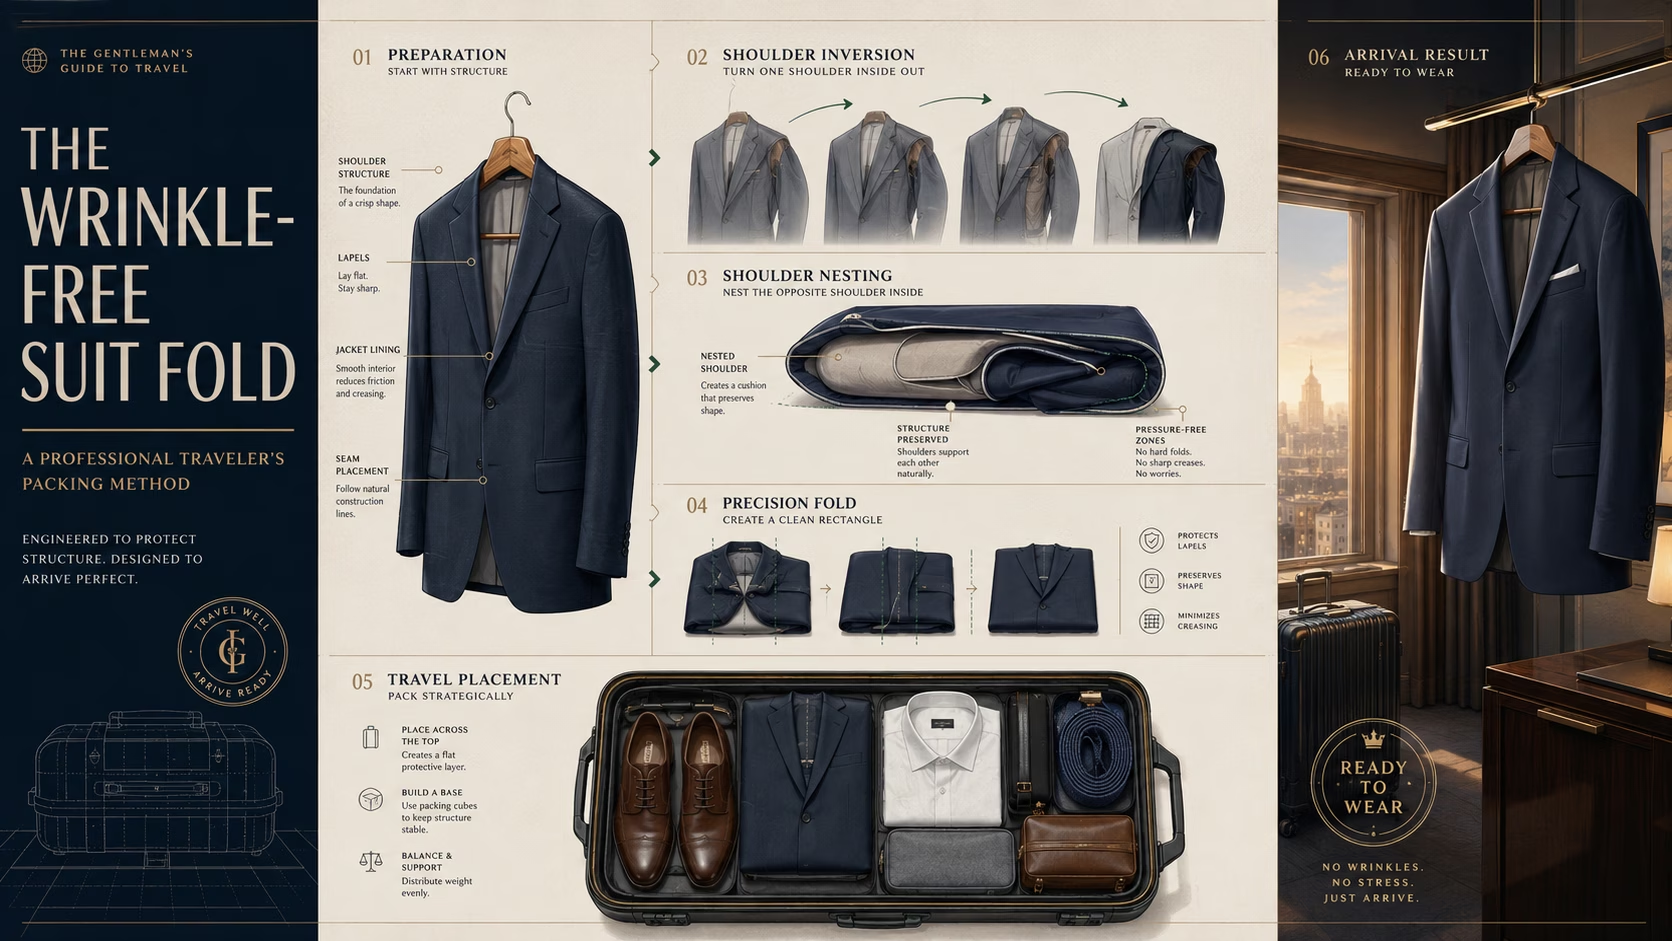
Turn the left shoulder of the jacket inside out. Tuck the right shoulder into the inverted left, nesting the two shoulders face to face with the lining facing outward. Lay flat and roll from the collar downward into a compact cylinder. The outer fabric is protected inside the roll, and rolling distributes compression across a curve rather than concentrating it at a fold line.
Place the roll horizontally across the top of the packed bag — the last item in.
For the trousers with this method:
Fold along the natural crease lines, waistband down by one third, then roll from the hem toward the waistband. Wrap the trouser roll around the jacket roll for a single compact unit, or lay it alongside.
Why this method works in a carry-on:
The inside-out roll fits across the width of most standard 55 x 40 x 20 cm cabin bags. Packed at the top, it sits under the lid rather than under the weight of other items. The flight duration is typically short enough that the natural elasticity of a good wool suit recovers the compression without requiring anything beyond hanging on arrival.
Method 3: The Bundle Wrap
The least well-known method and the most effective for a full suitcase where multiple garments need to be packed alongside the suit.
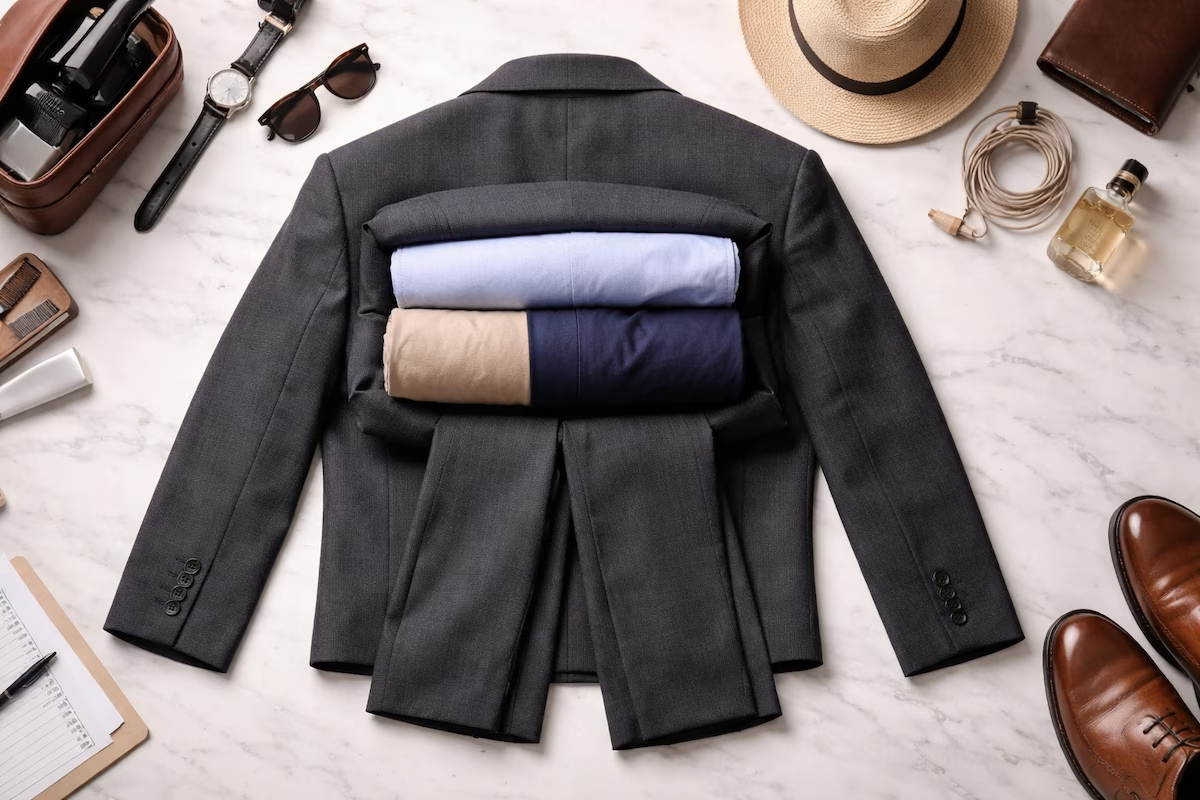
The bundle wrap works on a principle of protective layering rather than isolation. Instead of placing the suit in a separate bag or rolling it independently, the suit becomes the outermost wrapping layer around a structured core of softer items — which themselves protect the suit from the friction of the suitcase walls.
How to bundle wrap a suit:
Step 1 — Create the core. Build a firm, rounded core from rolled items that will not crease: socks, underwear, a rolled t-shirt, or a packing cube. The core should be roughly the size of a rugby ball — large enough to give the suit structure but small enough to be wrapped.
Step 2 — Layer wrinkle-resistant items around the core. Place sweaters, casual trousers, and other flexible garments around the core, each one draped across it with excess fabric hanging over the sides.
Step 3 — Place the suit trousers. Lay the trousers across the bundle perpendicular to the previous layer, with the waistband at one side and the legs hanging over the other. The trouser legs hang over the edge of the suitcase for now.
Step 4 — Place the suit jacket. Lay the jacket face-down across the bundle with the collar at one end and the hem hanging over the other. Smooth it flat.
Step 5 — Wrap inward. Fold the jacket hem up and over the core. Fold the trouser legs up and over. Then fold each previous layer inward in reverse order, each one wrapping the layer before it. The result is a cocoon — the suit on the outside, the soft items providing a cushioned interior that holds the suit in a gentle curve rather than a sharp fold.
Why this works: The bundle wrap eliminates the sharp fold lines that suitcase packing normally creates. The suit curves gently around the core rather than folding at a hard angle. The surrounding soft items absorb friction between the suit and the suitcase walls. For a multi-day business trip where the suitcase contains several days’ worth of clothes, this is the most space-efficient and crease-resistant method available.
Choosing the Right Bag for Your Suit
The bag type determines which method is optimal — and which ones are not.
Carry-on cabin bag (55 x 40 x 20 cm): Inside-out roll. The bag is too small for a garment bag to travel properly and too shallow for a full bundle wrap. Roll the suit and place it across the top.
Weekender holdall or duffel: Inside-out roll or bundle wrap. Both work well in a holdall. The bundle wrap is better if the bag also contains several other garments; the roll is faster and sufficient for a one or two-night trip.
Full-size suitcase (checked luggage): Bundle wrap or garment bag laid flat. The suitcase has the space for the bundle wrap to be executed properly, and the depth to accommodate a bi-fold garment bag lying flat on top of the packed contents. If using a garment bag in a checked suitcase, lay it flat on top of everything else and ensure the suitcase is not overstuffed — overstuffing creates pressure on the garment bag from the lid, defeating its purpose.
Hardside vs softside suitcase: A hardside suitcase provides rigid external protection — better for checked luggage where the case is handled by others. A softside suitcase has more flexibility and can accommodate an overpacked bundle wrap more forgivingly. Neither is significantly superior for suit packing if the correct method is used.
Packing the Rest of the Suitcase Around the Suit
The suit’s position in the bag determines how much pressure bears down on it during transit. The packing order matters as much as the folding method.
The correct packing order for a suitcase:
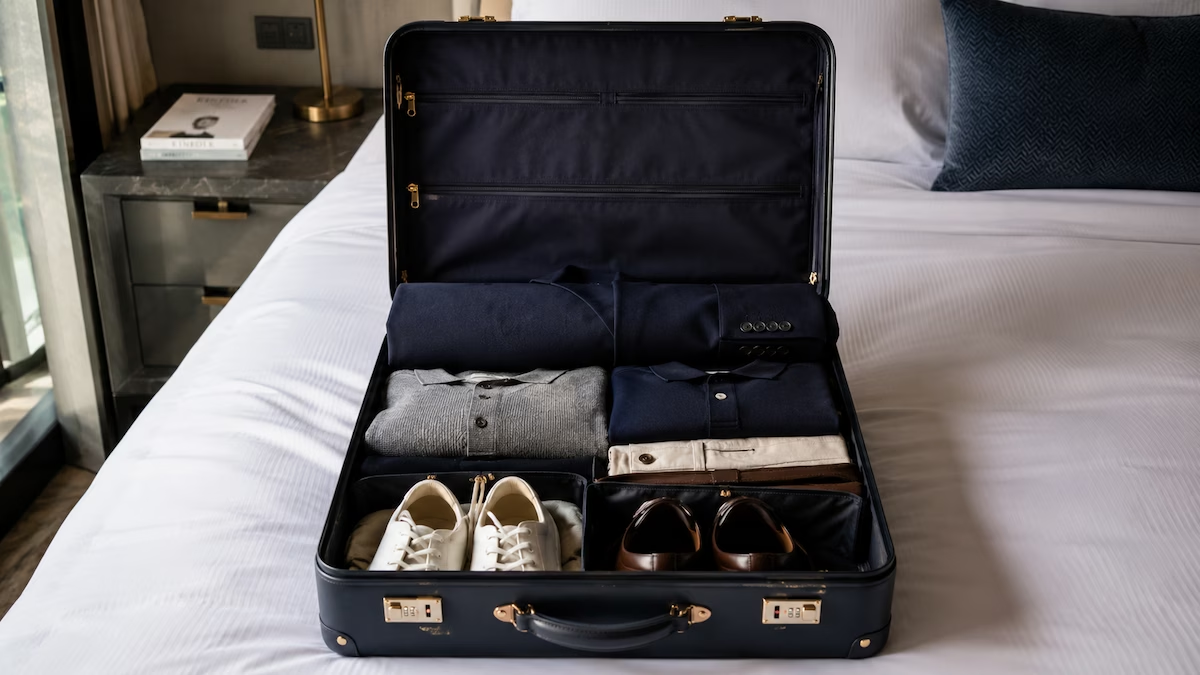
Bottom layer — shoes. Place shoes at the bottom of the suitcase (the base when it stands upright), soles against the suitcase wall. Stuff shoes with socks or shoe trees to maintain shape and use the interior space. Place shoes in shoe bags or clear plastic bags to prevent dirt transfer. Shoes at the bottom keep the heaviest items away from the suit.
Second layer — toiletries and hard items. Any liquid containers in a sealed bag, chargers, adapters, small hard-sided items. These sit above the shoes and below the clothes.
Third layer — casual clothes and accessories. T-shirts, casual trousers, knitwear. These form the base of the clothing stack and the core for a bundle wrap if using that method.
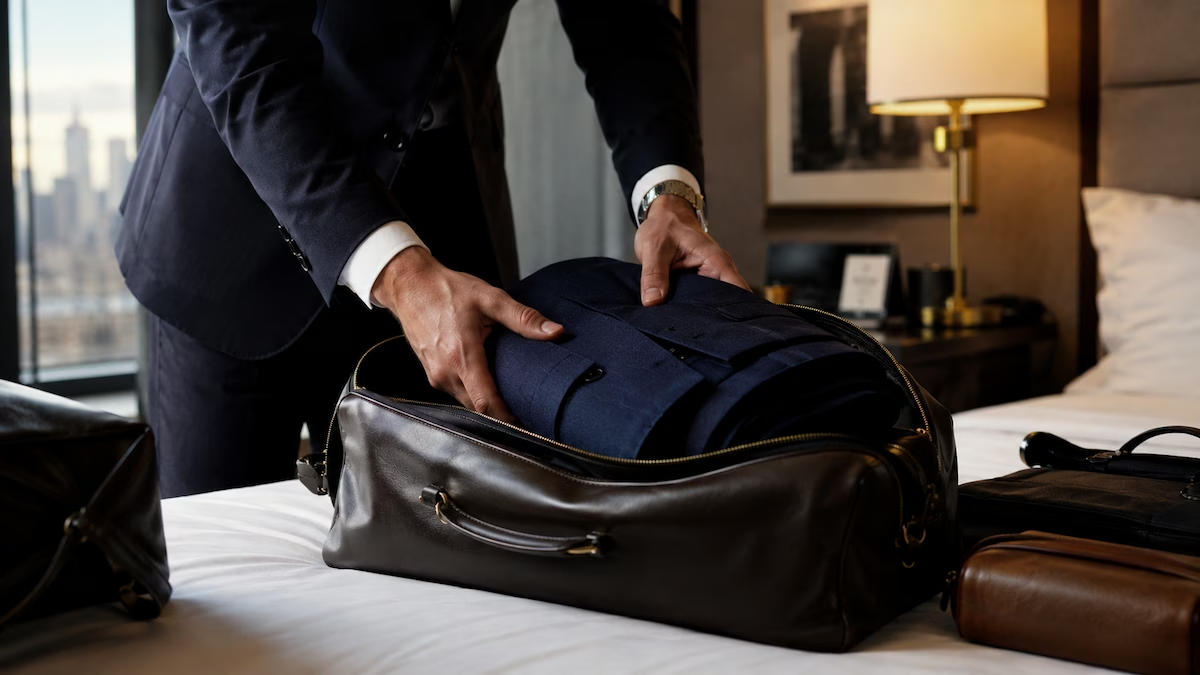
Top layer — the suit. Last in, first out. The suit sits at the top of the pack with the minimum of weight pressing down on it. In a carry-on, this means the suit is directly under the lid. In a checked suitcase, the suit is on top of everything else with room to breathe before the case is closed.
The most common packing mistake: placing the suit in first and everything else on top. This places the full weight of the case contents on the suit for the entire journey. It is the single most avoidable cause of travel creasing.
Packing a suit correctly is one piece of a broader suiting foundation — for everything from measuring and fitting to styling and building around it, see The Complete Men’s Style Guide.
On Arrival: The Protocol That Recovers a Suit
Regardless of how well the suit was packed, the arrival routine determines the final result.
Step 1 — Unpack immediately. The moment you reach the hotel room, remove the suit from the bag. Every additional minute compressed in the suitcase after arrival allows the creases to set further. Unpack the suit before doing anything else.
Step 2 — Hang on a wide-shouldered hanger. Hang the jacket and trousers on a proper hanger — not a wire hanger, which cannot support the shoulder seam of a jacket and distorts the shape under the fabric’s own weight. Most hotel wardrobes have at least one decent hanger. If not, ask reception.
Step 3 — Assess the creasing. Light surface wrinkles on the body of the jacket and trousers will relax on their own within thirty to sixty minutes of hanging in a warm room. These require nothing beyond patience.
For more significant creasing — particularly on the trouser front crease and the jacket chest — the bathroom steam method is the most effective non-equipment solution available.

The bathroom steam method: Run the shower on its hottest setting. Hang the suit on the bathroom door rail or shower curtain rod — close to the steam but not in the direct water stream. Close the bathroom door. Leave the suit for fifteen to twenty minutes. The hot steam penetrates the wool fibres, relaxes the compression that set the crease, and allows the fabric to fall back into its natural shape as it cools.
Do not leave the suit steaming for more than twenty minutes — extended humidity can soften the canvas interfacing in the jacket chest and temporarily reduce its structure. Fifteen minutes is sufficient for all but the most stubborn travel creases.
The hairdryer method — for targeted creases: For a single stubborn crease on a trouser leg or jacket panel, a hotel hairdryer on a medium heat setting can be effective. Lightly dampen the creased area with a damp cloth first, then direct the hairdryer across the section from a distance of six to eight inches while pulling the fabric lightly taut with the free hand. Move constantly — do not hold the heat in one spot. This is a precision tool for a specific crease, not a whole-garment solution.
The damp towel press — last resort: If no steam or hairdryer is available, a damp towel laid flat over the creased area and pressed firmly by hand — then left to dry on the garment — applies moisture and light pressure that can release moderate creases. It is slow and imprecise compared to the steam method but requires no equipment beyond a towel.
For the complete ironing technique — collar sequence, sleeve crease, button placket — that produces the sharpest pre-event shirt press when an iron is available, How to Iron a Dress Shirt covers every step in the correct order.
The Suit You Pack Matters: Fabric Guide for Travellers
Not all suits travel equally. The fabric determines how much work the packing method and arrival routine need to do.
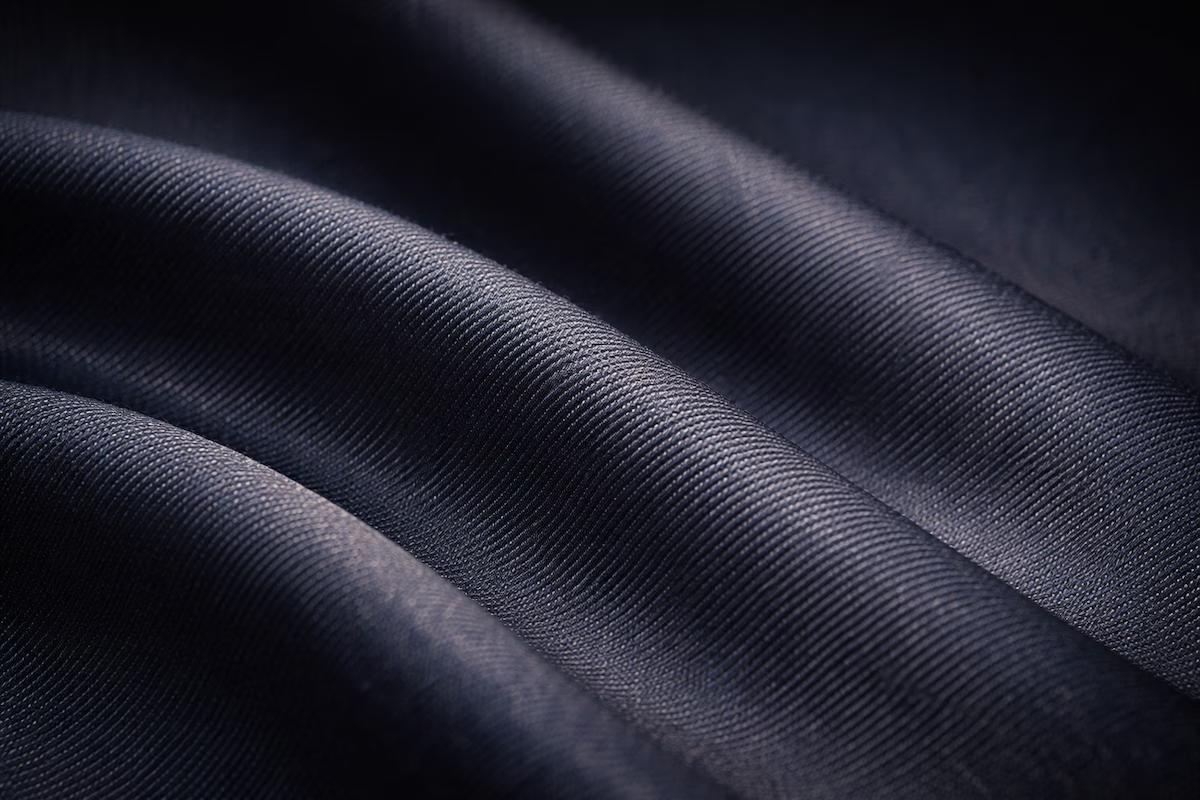
High-twist wool (travel wool): The best option for frequent business travellers. The tighter twist of the fibre gives it greater springiness and crease recovery — it bounces back from compression faster than standard wool. Most suits marketed specifically as ‘travel suits’ use high-twist wool as their primary fabric.
Wool-polyester blend: Slightly less luxurious in hand than pure wool but significantly more wrinkle-resistant. The synthetic component adds dimensional stability — resistance to both setting into creases and recovering from them more slowly. A 70/30 or 80/20 wool-polyester blend is an entirely acceptable choice for a travel suit and an honest one.
Wool-lycra blend: The lycra (elastane) component adds stretch and recovery. Good for men who move significantly in their suits — travel, long meetings, event attendance — and want the suit to maintain its shape through physical activity as well as transit.
Standard wool (super 100s-120s): The benchmark business suit. Travels adequately with careful packing. Does not recover as quickly from deep-set creases as higher-twist or blended fabrics. A good choice for occasional travel; a demanding choice for weekly travel.
Linen: Do not pack in a bag for travel. Linen creases under minimal compression and the creases are slow to release. Reserve linen suits for car travel, boat travel, or any journey where the suit can hang throughout.
Cotton: Between linen and wool. Manages moderate packing but creases more readily than wool and recovers more slowly. Acceptable for short-distance travel with careful method; not the first choice for long-haul or checked-luggage travel.
Before You Pack: Know the Occasion
A suit packed correctly for the wrong occasion is still a problem. Before the bag is zipped, the dress code of the destination event should be confirmed.
If you are travelling for a wedding, a business conference, a dinner, or any occasion with a specific dress code — and you are uncertain what the suit needs to accompany in terms of shirt, tie, shoes, and accessories — the Dress Code Decoder resolves that before you pack. Input the occasion and formality level; it outputs the complete outfit. You pack what is needed, nothing more.
Overpacking — taking more than necessary ‘just in case’ — is one of the primary causes of suit creasing in checked luggage. A suitcase packed to 70% capacity with exactly what is needed for the trip has significantly less internal pressure on every garment than one packed to 100% with contingency items. Pack with a purpose, and the suit has room to breathe.
The Suit Is Packed. The Loafers Are Next.
One practical note on footwear for travel: the shoes at the bottom of the suitcase should be correct for the occasion, not just convenient. If the suit you’ve packed is for a smart dinner or a business meeting, the shoe needs to match that register.
For the complete guide to pairing shoes with tailored outfits — including which loafer works with which trouser and suit combination — The Gentleman’s Guide to Styling Loafers covers every combination that works and why.
The man who arrives impeccably dressed did not leave it to chance. He understood the method, chose the right fabric, and gave the suit thirty seconds of attention before closing the bag.
Complete the Sharp Wardrobe travel series: How to Fold a Suit for Travel | How to Iron a Dress Shirt | How to Measure for a Suit Jacket
Frequently Asked Questions
How do you pack a suit in a bag so it doesn't wrinkle?
Use one of three methods depending on the bag. For a carry-on or holdall, use the inside-out roll: turn one jacket shoulder inside out, nest the other shoulder into it with the lining facing outward, and roll from the collar downward. For a full suitcase, use the bundle wrap: layer soft items as a cushioned core and wrap the suit around the outside in gentle curves rather than sharp folds. For car or train travel, use a quality garment bag that can travel fully flat or hung. In all cases, pack the suit last — on top of everything else — and unpack and hang it immediately on arrival.
What is the best way to pack a suit jacket without creasing it?
The inside-out roll method is the most reliable for most travel scenarios. Turn the left shoulder of the jacket inside out, fold the right shoulder into the inverted left shoulder so both are nested face to face with the lining on the outside, then roll from the collar down into a compact cylinder. This protects the visible outer fabric inside the roll and distributes any compression across a continuous curve rather than a sharp fold line. Place the roll horizontally at the top of the bag as the last item packed.
Does rolling a suit jacket prevent wrinkles?
Yes, significantly more effectively than flat folding. Rolling distributes the compression from the bag’s contents evenly across the fabric rather than concentrating it at a fold line. The inside-out orientation adds further protection by keeping the outer fabric shielded inside the roll. A flat-folded jacket packed in a full suitcase creates sharp crease lines at every fold point — the chest, sleeves, and back — that rolling prevents.
Should you use a garment bag or roll a suit for travel?
Use a garment bag when it can travel hung or fully flat for the entire journey — in a car boot, on a train with luggage space, or in a cabin closet on a flight. Use the inside-out roll when the bag must be packed in an overhead locker or carried as a holdall, because a garment bag folded to fit introduces the same fold lines it was designed to prevent. The method that keeps the fabric in gentle curves — rather than compressed flat folds — produces the better result regardless of which option that is for the specific journey.
How do you get wrinkles out of a suit after travelling?
Hang the suit on a wide-shouldered hanger immediately on arrival. For light surface wrinkles, thirty to sixty minutes of hanging in a warm room is often sufficient. For deeper travel creases, use the bathroom steam method: run the hotel shower on its hottest setting, hang the suit near the steam inside a closed bathroom for fifteen to twenty minutes. The steam penetrates the wool fibres and releases the compression that set the crease. Do not exceed twenty minutes or the jacket’s canvas interfacing can soften temporarily.

Ali Taimour
Founder and Editor of Trendy Enthusiast. Ali covers men's fashion, lifestyle, grooming, and the art of dining well - blending real experience with practical insight.
Connect on Instagram